How do I use the AHS Calendar (AuthorPlanner)?
The Author Helper Suite’s AuthorPlanner allows you to schedule events, promotions, and tasks so that you can keep all of your scheduling needs in one spot. You’ll also be able to manage the color schemes of the different items so that you can more easily track your month/day at-a-glance.
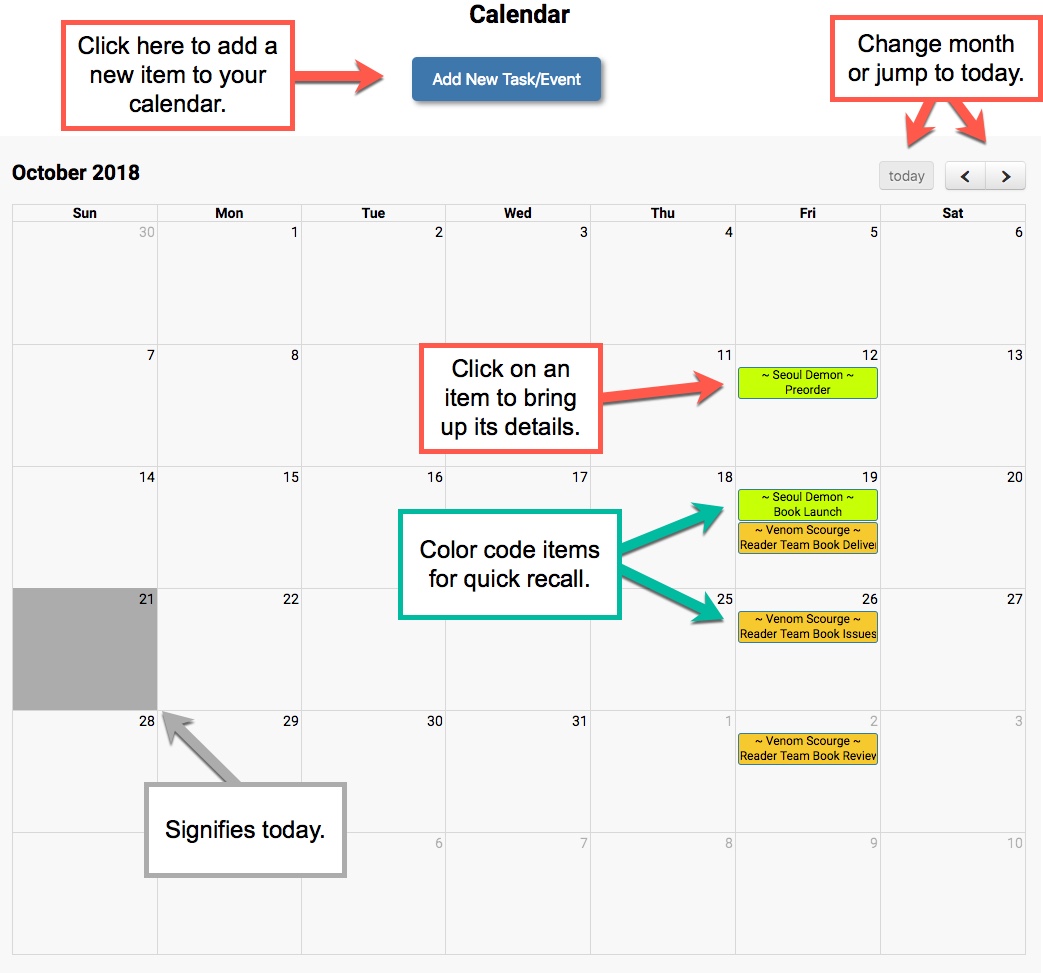
Adding a New Item to the Calendar
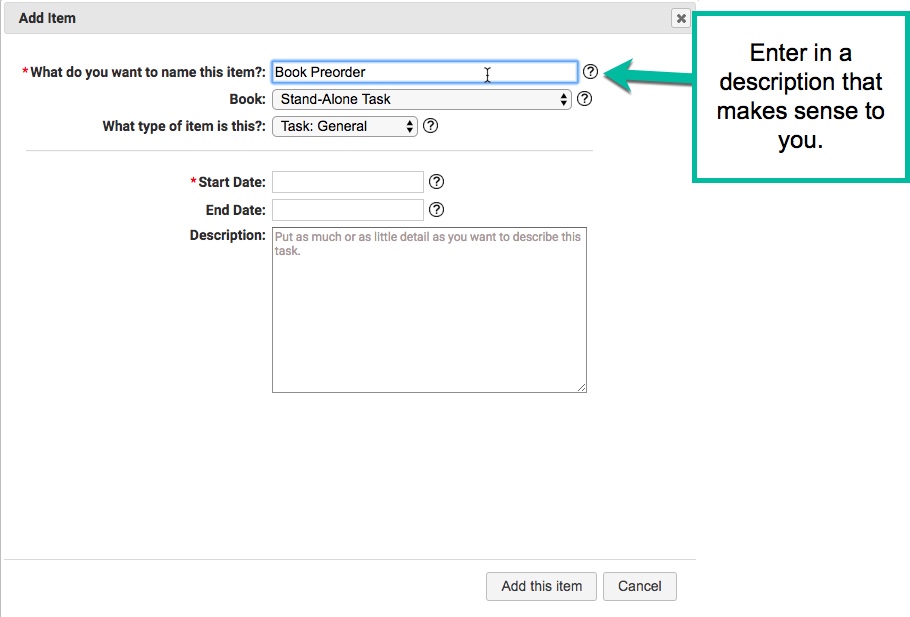
Step 1: Name the item. It’s usually best to give an item a brief title, but whatever works for you best is what you should do. Remember, this is your calendar!
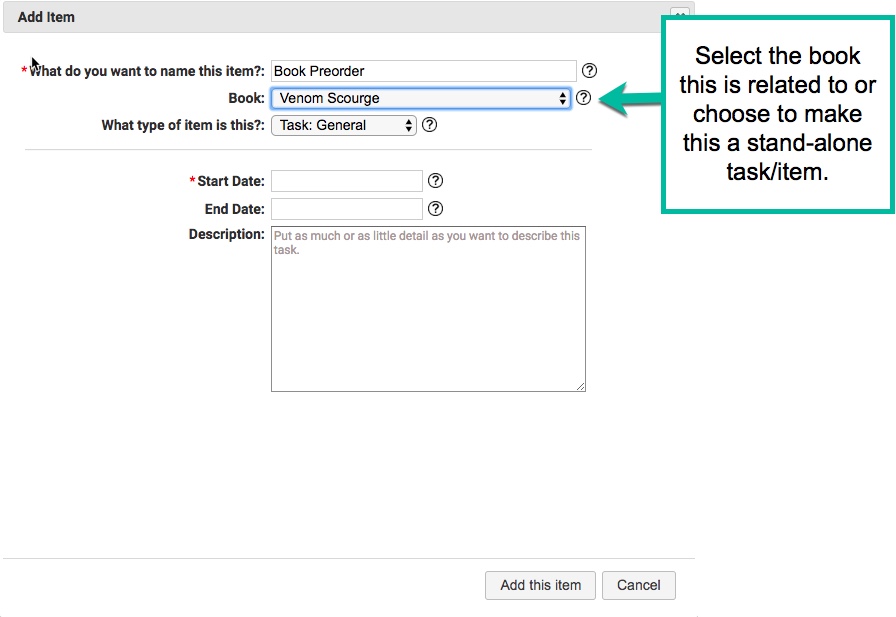
Step 2: Connect the book. Since most items are directly tied to a task you want to accomplish for a particular book, you can directly connect the item to that book. Alternatively, you can mark this as a stand-alone task, which will mean it will only appear on this calendar view. It will not appear on the individual book calendars.
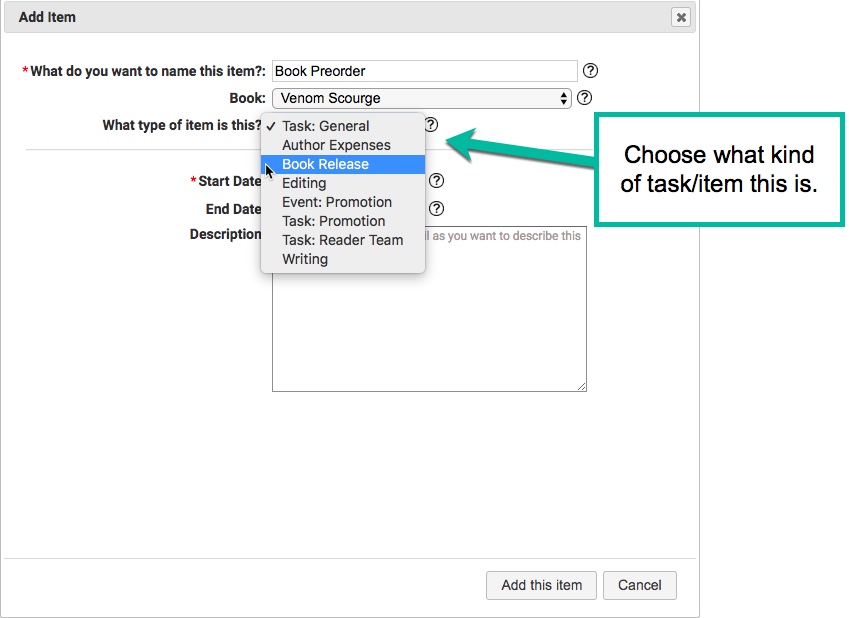
Step 3: Select the task type. There are a number of built-in task types, and you may have created a few of your own. Here is where you set the kind of task that represents this item. Doing so will give it a color scheme that helps you see what an item is more easily.
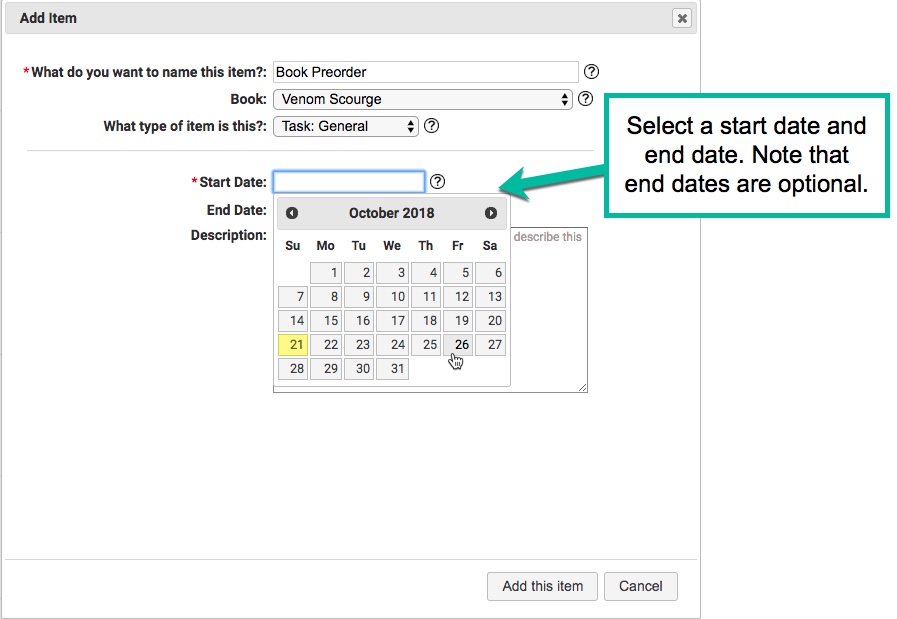
Step 4: Set the dates. You can set the start and end date for this item or just set the start date and The Author Helper Suite will automatically make the end date match. A start date is required, though.
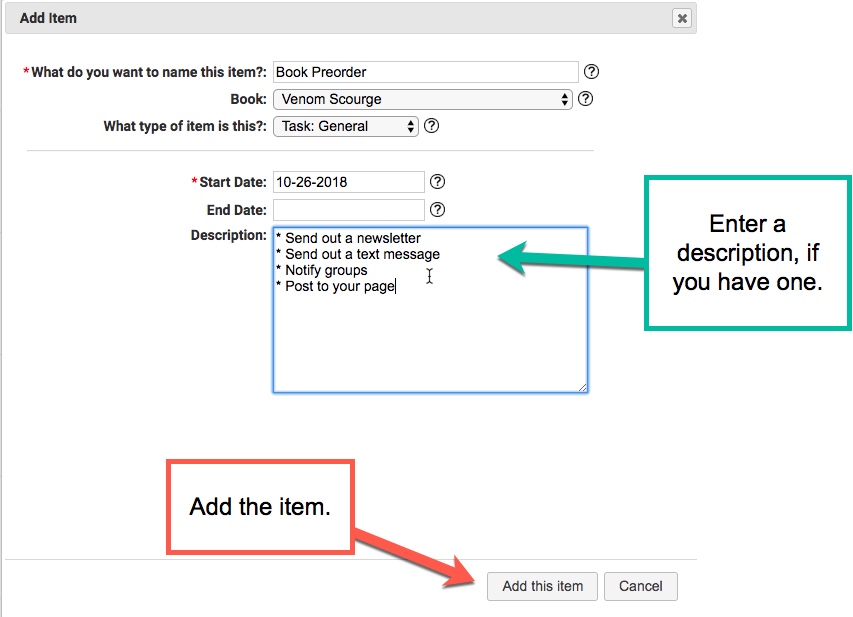
Step 5: Describe the task. This is where you want to give yourself the details you need to succeed at this task/event. You can be as brief or verbose as you like here.
Related Articles
What is a Core Task and how do I use it?
The Core Tasks feature in The Author Helper Suite allows you to create a set of task blueprints that will then be automatically added to all of your books for you. So, instead of having to go into each book and add a new task for your getting cover ...Why would I use The Author Helper Suite calendar instead of Outlook or Google?
The benefits of using the AHS Calendar are the same with every other feature we offer, convenience. We've worked hard to make a self-contained tool that will allow you to hop in, do your marketing, publishing or launching work and hop out. In that ...I have a ton of tasks and events coming up and my calendar is a mess. How can I organize it?
Whenever you add tasks, you can assign specific tracking types for them. So, for example, if you wanted to track all of your writing tasks, you could set up a type called ‘writing’. Getting to the Task Types Area To add/manage the task types, click ...What's the difference between the book calendar and the calendar?
The Author Helper Suite Book Calendar lets you go into your book and see the schedule, tasks and milestones for just your book. A lot of us need to focus for us to achieve our goals, so having all of your book's to-dos and events in one place is ...How to upload your Facebook Ads to AHS
Grabbing your Facebook Ads data There are two ways you can get your Facebook Ads data. One of them is to go to the Facebook Ads Manager, set everything up appropriately, choose your timeframe, and download the data. Then, once you have it, go to the ...